Hello everyone! I am super excited today to participate in Mayya’s wonderful Inspire To Create series over at Sew Chic And Unique. I must say all the previous bloggers have wowed me with so many inspiring projects, and I feel very honored when Mayya invited me to participate. Please do drop by Mayya’s blog to see them, as well as all the fabulous things she blogs about.
I must confess that I am a diehard fabric fan. I hoard fabrics like crazy thus sewing is the next logical thing to do. However I wanted to more than just churning out clothes or bags. I wanted to share my passion.
When I first started this blog, my main intention was to document my sewing for my girls so that when they grow up they could come back anytime to see what mommy sewed for them as well as read the little tid bits I wrote. I am also hoping to inspire them to be more creative and sew if they want to.
Later, as my readers grow, I feel tremendous joy to be able to share my sewing adventure with so many wonderful people on blogville. Thank you all for stopping by and keeping me company as I step on the sewing machine pedal in this little studio of mine and blog about it :)
Today, I would like to share a tutorial on how I made this cute Sling Pouch for my girls. Let’s get started shall we? :)
First, the pattern. The pouch pattern is a simple bowl shape of approximately 6 x 5 inches you can always draw yourself. If you’d like to skip the drawing part, feel free to download my pattern here.
Use the pattern to cut 2 outer fabric, 2 lining fabric, 2 interfacing, 2 quilt batting (optional). I am quilting my outer pieces, you can skip this part if you don’t want to quilt it. In the above picture I already interfaced the outer pieces.
Next, if you are quilting the outer pieces, take the batting and the outer pieces and quilt through all layers. You can either use adhesive spray to temporarily bond it for quilting or just pin since it is such a small piece. If you're wondering this is the spray I used (I bought it at Craftworld) :
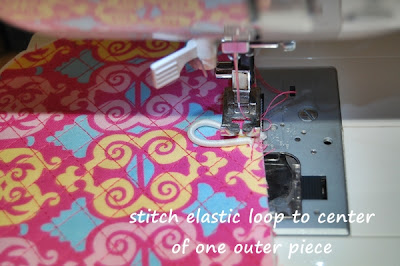
Next steps are shown in these pictures with additional steps marked in * ( the ones I forgot to take pics :P )
* Repeat with the Lining Pieces
* Turn the pieces right side out, press along the top opening, then topstitch all around, sewing the gap shut.
And perfect for storing little treasures! (It's something Aisha sewed if you're wondering and I have no idea what it is lol)
I really hope you like the tutorial and please do let me know if you try it ya?
Lastly I would like to again thank Mayya for inviting me to participate in Inspire to Create. Thank you for reading and have a wonderful day! :)


