Showing posts with label Tutorial. Show all posts

Sunday, 28 December 2014

My First Magazine Feature 2014 _ Nur Magazine (Karangkraf)

This is a waaayyy overdue post. I was featured in a local magazine in their DIY column for 2 issues in April and May 2014. While I have posted about this on my Instagram and Facebook page, I completely forgot to blog about it.


So here it is. The first was an article about my passion for sewing in Nur Magazine April issue. This is really the highlight of my sewing this year. I remember feeling happy and proud and teary-eyed all at the same time :)


The article is in Bahasa Malaysia, it talks about how I started sewing, my handmade brand, my products among other things. Looking at these pages with my colorful creations on it, just made me feel a tad nostalgic....I wish I can be more productive these days!


This is the cover of May issue of the same magazine. I contributed two tutorials for this issue's DIY column.


The tutorials are for Linen and Lace tissue holder and Kids Apron. The crew came to my house to shoot these tutorials and it was really hard work! It took almost one whole day to finish!

I have another sewing tutorial contribution for a different magazine in January 2015. I will blog about it once I get hold of my copy of that magazine.

:)

Monday, 31 January 2011

Hemming Sheer Fabric Tutorial

I am, at the moment, swimming in fluffly, shimmery, very sheer, very slippery fabrics, a.k.a Organza - yikes!!


As I am working, in my eagerness to sew using organza, I realised hemming it is a an issue, a HUGE one for me! I mean the usual press and turn won't work and organza frays like crazy!

So I experimented a few techniques, using different presser feet and managed to put up this tutorial. I hope it is useful to another adventurous sewing friend out there, braving sheer fabrics for the first time like me. Pay attention to caption notes I wrote under the pics. Enjoy! :)


You want a SMALL zig zag stitch length. This is what I used on my Singer Confidence.

No need to pin...Keep rolling/folding the fabric edge as you sew. Do it slowly :)
 

The result - rolled hem using regular multipurpose feet.


Let's try and see....

Somehow, the result is better using the regular foot  :)


After a lot of trial and error and this experiment, I personally feel that hemming organza using a sewing machine is neater and more uniformed. You'd see some bits of fabric fray on them, just trim it and you'd achieve a nice result.

BUT, because I'm churning 3 gowns over here - I am opting for the serger rolled hem this time aound, purely because it's faster. So again, it's a matter of personal preference.

I hope you like the tutorial, have a great day! :)

Wednesday, 19 January 2011

Edge Stitch Tutorial

I was sewing many, many ribbon sash for dresses the last few days. I used to have issues with getting the top stitching on the edge of sash, camera strap cover or any straight edge even, without any derailment. Yes it can be done using the regular multipurpose foot, but I struggled and the results are never good enough. 

Then I remember this blind hemming foot that comes standard with any sewing machine. I had never used it before because obviously my sewing repertoire is not large enough to include blind hemming anything hahaha...So, after some trial and error, I discovered that this foot is great at keeping my edge-stitching straight and even. I took a few photos and prepared this tutorial for some kindred souls out there who might need this as much as I did. Enjoy!


Thursday, 30 September 2010

Tutorial : Little Girl Sling Pouch


Hello everyone! I am super excited today to participate in Mayya’s wonderful Inspire To Create series over at Sew Chic And Unique. I must say all the previous bloggers have wowed me with so many inspiring projects, and I feel very honored when Mayya invited me to participate. Please do drop by Mayya’s blog to see them, as well as all the fabulous things she blogs about.

I must confess that I am a diehard fabric fan. I hoard fabrics like crazy thus sewing is the next logical thing to do. However I wanted to more than just churning out clothes or bags. I wanted to share my passion. 

When I first started this blog, my main intention was to document my sewing for my girls so that when they grow up they could come back anytime to see what mommy sewed for them as well as read the little tid bits I wrote. I am also hoping to inspire them to be more creative and sew if they want to. 

Later, as my readers grow, I feel tremendous joy to be able to share my sewing adventure with so many wonderful people on blogville. Thank you all for stopping by and keeping me company as I step on the sewing machine pedal in this little studio of mine and blog about it :)


Today, I would like to share a tutorial on how I made this cute Sling Pouch for my girls. Let’s get started shall we? :)

First, the pattern. The pouch pattern is a simple bowl shape of approximately 6 x 5 inches you can always draw yourself. If you’d like to skip the drawing part, feel free to download my pattern here.


Use the pattern to cut 2 outer fabric, 2 lining fabric, 2 interfacing, 2 quilt batting (optional). I am quilting my outer pieces, you can skip this part if you don’t want to quilt it. In the above picture I already interfaced the outer pieces.


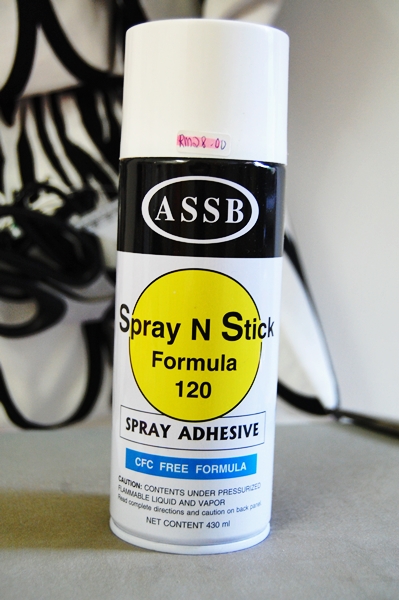
Next, if you are quilting the outer pieces, take the batting and the outer pieces and quilt through all layers. You can either use adhesive spray to temporarily bond it for quilting or just pin since it is such a small piece. If you're wondering this is the spray I used (I bought it at Craftworld) :


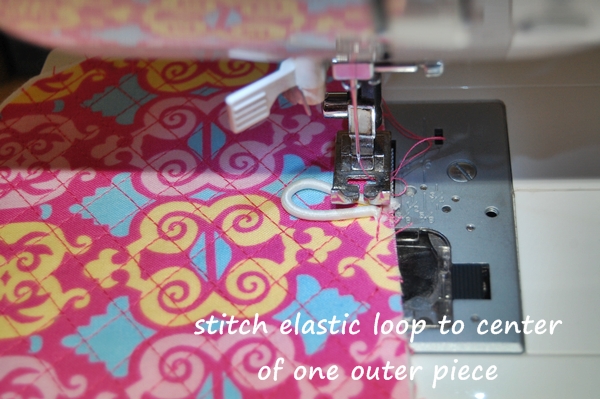
Next steps are shown in these pictures with additional steps marked in * ( the ones I forgot to take pics :P )


* Repeat with the Lining Pieces


* Turn the pieces right side out, press along the top opening, then topstitch all around, sewing the gap shut.


Now, your new sling pouch is ready to be modeled :


And perfect for storing little treasures! (It's something Aisha sewed if you're wondering and I have no idea what it is lol)


I really hope you like the tutorial and please do let me know if you try it ya?

Lastly I would like to again thank Mayya for inviting me to participate in Inspire to Create. Thank you for reading and have a wonderful day! :)

Thursday, 13 May 2010

Tutorial - Ruffled Tissue Holder


I made a few of these cute tissue holder as gifts. It's an easy project, barely 20 minutes each. They are smaller in size meant to store pocket tissues that come in cubed, smaller packet, not the flat packaged soft tissues. I love that now I can store tissues in my purse sans the icky plastic cover :D

Here's how I made it. It's pic heavy  but I don't wanna miss any step.

**Please note the measurement for ruffle piecce is 5.5" x 1.5". Sorry for the previous mistake.


LinkWithin

Related Posts with Thumbnails